


What is Redux Toolkit?
It is an effective and user-friendly tool for managing application state in React and other JavaScript frameworks.
It is based on the well-known Redux package, which gives your application a predictable and centralized way to manage data.
Redux Toolkit makes it simple to create new Redux stores, set up actions and reducers, and link components to the stores.
Redux Toolkit's ability to make the setup procedure for brand-new Redux applications simpler is one of its primary advantages.
You can set up your store, actions, and reducers automatically with only one setup file.
This eliminates the need for tedious and error-prone manual boilerplate code creation.
A common Redux configuration includes:
Actions
Redux actions have a payload and a type.
The payload is the data that the reducers utilize to update the store, and the type specifies the kind of action that is passed to the reducer.
Redux actions are commands that are sent by UI elements.
A dispatcher transmits an action's trigger to the reducer when it occurs inside a component.
Reducers
The only way to update the Redux store is through reducers.
Based on the action type and payload, the reducer takes an action and modifies the state.
State
The state designates the location of the data.
When components are linked to the state, an update to the state triggers a re-render of those components.
Redux Toolkit's capacity to reduce the amount of boilerplate code necessary to maintain the application state is another advantage.
It uses thecreateSlice function to have actions and reducers generated automatically rather than manually.
This not only saves time but also improves the readability and maintainability of your code.
Installing the@reduxjs/toolkit package and making a store.js file in your project are both prerequisites for using the Redux Toolkit. The createSlice the method can be imported into this file and used to build your actions and reducers.
So I'd be building a simple e-commerce app, using the Redux Toolkit for our state management.
To start with, create a folder and install the redux-toolkit package into our project. We run the below command;
npx create-react-app my-app --template redux
The above command takes advantage of Redux Toolkit and React Redux's integration with React components.
After running the above command, our project would have the below folder structure with the boilerplate already installed for us.
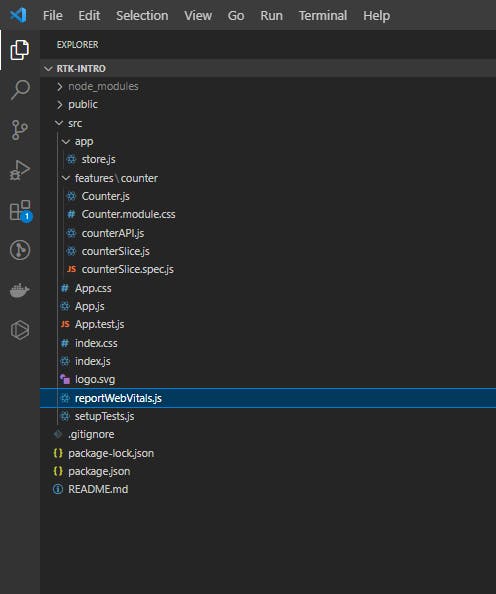
We have the store, which carries the entire state of our application, and the features folder, which contains our slice (which houses the reducers),, component file, tests, files, etc. I'd be editing the folder to suit our project and adding a UI for our app.
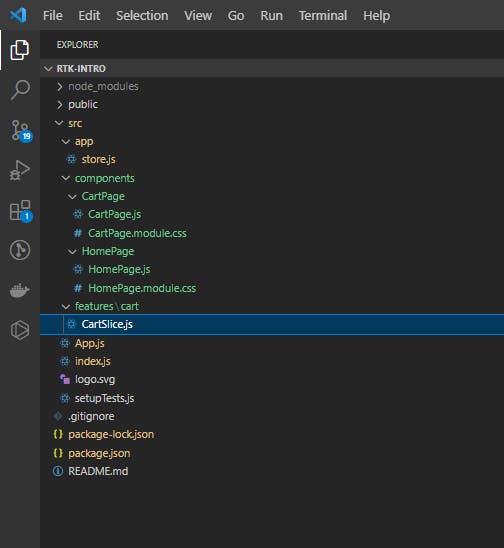
After customizing our project structure and installing the necessary dependencies, our homepage component looks like this:

and we have the following project structure:
Now that we have bootstrapped our app, let's delve into our redux toolkit for global state management.
We have a central store that carries the entire state of our app, and takes in reducer to perform actions in the store. Thanks to RTK, we have that already.
Next, we create our slice.
i. we import
createSlicefrom redux/toolkit, create a slice and defineinitialStatewhich is an array of items entering our cart.we pass the name of our slice,
initialState, and reducers into thecreateSlicefunction
import { createSlice } from "@reduxjs/toolkit"
const initialState = [];

export const cartSlice = createSlice({
    name : 'cart',
    initialState,
    reducers: {

    }
})
Now that we want to add an item to the cart on click of the "Add" button in our app, we need to create a reducer for this that checks if an item is already in the cart before adding it to prevent adding the same item multiple times.
Then, we create an add reducer , like I mentioned earlier, we'd have to confirm if the item is in a cart first before adding it. To do this, we have ensure the id of the item we adding to the cart must be equal to the id generated when an action is triggered.
Hence if present, do nothing else add item.
The code snippet below shows how it's done.
add(state, action) => {
// check if an item is present in the cart, we use the find method.
const productInCart = state.find((item) => item.id === action.payload.id)

// if product is not found, add the item in cart with quantity 1.
if (!productInCart){
     state.push({...action.payload , quantity: 1})
}
}
after add we'd like to remove also, its similar to the add reducer, but instead we'd filter through our array of items and return those whose id is not equal to the id of the action payload.
Something like this:
remove(state, action) => {
// remember the state carries our items as they are being updated.
state.filter((item) => item.id !== action.payload.id)
}
After creating our reducers, we'd have to export them so they would be usable across our app.
export const { add,  remove } = cartSlice.actions

 export default cartSlice.reducer;
Now, combining these reducers together, our final code would look like this:
import { createSlice } from "@reduxjs/toolkit"
const initialState = [];

export const cartSlice = createSlice({
    name : 'cart',
    initialState,
    reducers: {
        add(state, action) => {
// check if an item is present in the cart, we use the find method.
        const productInCart = state.find((item) => item.id ===         action.payload.id)

// if product is not found, add the item in cart with quantity 1.
        if (!productInCart){
     state.push({...action.payload , quantity: 1})
        }
    },

    remove(state, action){
// remember the state carries our items as they are being updated.
    state.filter((item) => item.id !== action.payload.id)
    }

    }
});
export const { add,  remove } = cartSlice.actions

 export default cartSlice.reducer;
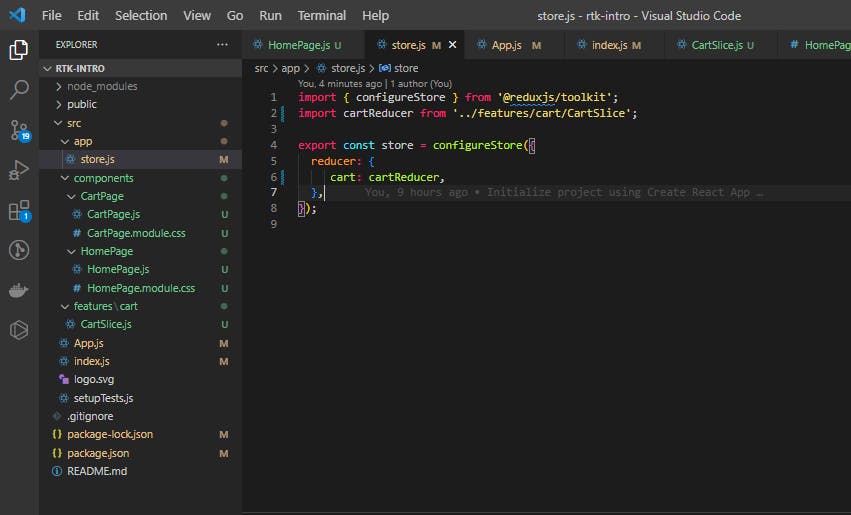
Remember, I stated above that the store takes in the reducer as an argument and performs actions.
Then we'd need to import our reducer and pass it into our store.
import { configureStore } from '@reduxjs/toolkit';
import cartReducer from '../features/cart/CartSlice';

export const store = configureStore({
  reducer: {
        cart : cartReducer
  },
});
We've set up our store and reducers, next would be to dispatch our actions, so we can see the effects in our app.
Now, we'd use two hooks namely , useSelector and useDispatch as their name implies, useSelector allows us to take a specific state from our state tree. It takes in a function argument that returns the part of the state that you want. It is an equivalent of mapStateToProps in redux .
useDispatch : This hook returns a reference to the dispatch function from the ReduxToolkit store. You may use it to dispatch actions as needed.
In our homepage component , we define the useDispatch and useSelector hooks
For useSelector :
import {useSelector} from 'react-redux'; // import first.

const count = useSelector((state) => state.cart) // it takes the entire state and selects the cart. the "cart" comes from the reducer in the store.
For useDispatch : we import and initialize too.
import {useDispatch} from 'react-redux'

const dispatch = useDispatch();
Having done all these, we can then dispatch to wherever in our app. In our project, we would be dispatching the add in the Add button.
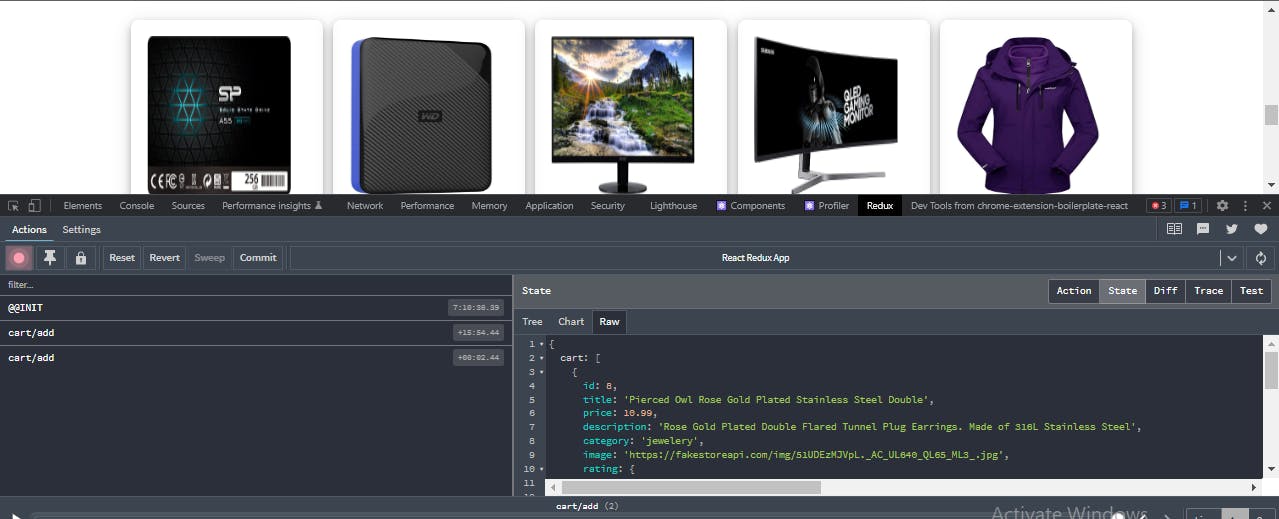
When the Add button is clicked the product is added in our store, which we can see in the Redux DevTools.
With this working as wanted, we can add a counter that displays the amount of items in our cart array.
We can do this by just getting the length of the cart array.
Having used the useSelector hook and initializing it to count above,
import {useSelector} from 'react-redux'; // import first.

const count = useSelector((state) => state.cart)
count.length //determines the length of array in our cart.
Then, we put it in our homepage component,

We would also want to route to our Cart page that displays our selected items in the array.
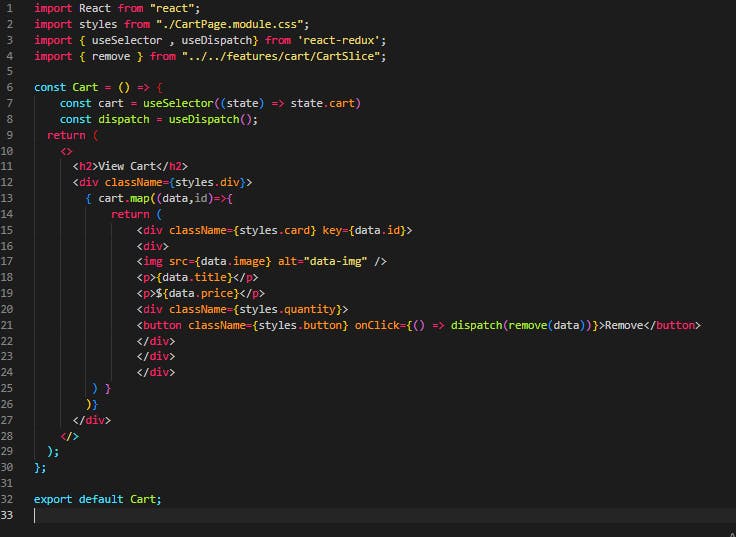
In the CartPage component, we would require our useSelector and useDispatch hooks to select our cart state and dispatch our actions.
   const cart = useSelector((state) => state.cart)
    const dispatch = useDispatch();
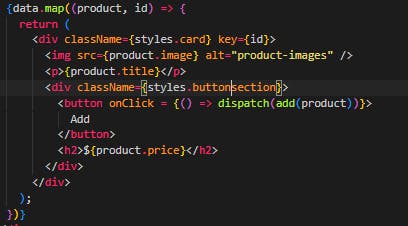
Then we map through the cart to display our array of data, and dispatch the remove action on our remove button.
Here's a shot of the code:
Here is our cart page containing an array of selected items:

And voila! , we done with our project using Redux Toolkit.
Here's a GitHub link to the project: https://github.com/Tola-byte/rtk-tutorial
In conclusion, Redux Toolkit is a powerful and easy-to-use tool for managing application state in React and other JavaScript frameworks. It simplifies the setup process for new Redux projects, minimizes the amount of boilerplate code required, and provides convenient ways to connect your components to the store. If you're looking to improve the organization and maintainability of your application state, give Redux Toolkit a try!